


Expanding a residential property is one of the most rewarding endeavors a homeowner can undertake. It adds physical space, builds long-term equity, and transforms how a family interacts with their environment daily. However, managing a major extension requires far more than simply picking out paint colors and flooring samples. A successful project relies on structured project management, clear communication, and precise scheduling across multiple specialized construction fields. Without a central plan, work quickly stalls, budgets inflate, and quality drops.
Before breaking ground, property owners must define the scope of work and assemble an experienced supervisory team. Hiring an established local home addition contractor provides the foundation for success. This professional acts as the project manager, navigating local building codes, pulling necessary permits, and creating an accurate timeline. They understand how one construction phase impacts the next, ensuring that trade workers arrive on site in the correct sequence.
Initial planning involves detailed site evaluation, soil testing, and architectural drafting. Engineers examine load-bearing structures on the existing house to determine how the new footprint will attach. Clear plans prevent costly mid-project changes and align everyone on expectations from day one. Proper groundwork laid during this early stage guarantees that every subsequent phase moves forward without unnecessary friction or budget surprises.
Groundwork, Excavation, and Site Preparation
Once permits are secured and plans are finalized, heavy machinery moves onto the property to begin site clearing. Excavation teams clear vegetation, remove topsoil, and dig trenches to prepare for the structural support system. Soil composition plays a vital role here, as unstable earth can lead to settling issues down the road. Proper compaction and soil stabilization are essential steps that cannot be rushed.
After excavation, concrete workers pour the footings and foundation walls. Whether the addition uses a poured concrete slab, a crawl space, or a full basement, precision is vital. The foundation must be perfectly level and square with the existing house. Even minor errors in the foundation will compound as framing progresses upward, leading to crooked walls, uneven floors, and misaligned window openings.
Foundation work also requires installing perimeter drainage systems to keep groundwater away from the new structure. Waterproofing membranes are applied to outer basement walls before soil is backfilled into place. Allowing adequate curing time for the concrete is critical. Rushing to frame over wet concrete compromises structural integrity. Once the foundation passes municipal inspections, the site is finally ready for vertical construction to begin.
Framing and Weatherproofing: Laying the Structural Skeleton

Framing brings the architectural vision to life as wood or metal studs form the walls, floor joists, and roof trusses. Carpenters work rapidly to establish the physical frame, securely tying the new build into the original structure. Load-bearing beams are installed to span large openings, creating wide passages between old and new living areas. Proper attachment to the existing home requires stripping back siding and integrating flashing to block moisture.
As soon as the structural frame is erected, shielding the interior from weather becomes top priority. Wall sheathing and protective house wrap are applied to block wind and rain. The roof structure is covered with plywood decks and synthetic underlayment. Skilled local roofers are called in to install shingles, metal panels, or tiles that match the existing roofing system. Their work prevents rain from damaging exposed timber frame components inside.
Proper flashing around roof valleys, chimneys, and wall intersections keeps rainwater flowing safely off the roof deck. Exterior doors and windows are set, shimmed, and sealed to seal the envelope against weather elements. Once the building envelope is weather-tight, interior trade workers can safely begin installing hidden utility networks without fear of water damage.
Roughing In Electric Systems: Powering the New Space
With walls sheltered from the elements, internal mechanical systems take center stage. Electrical infrastructure requires careful placement because modern homes demand substantial power for appliances, lighting, and electronics. Running wires through wall studs before drywall installation allows for quick, clean installation.
A licensed electrician inspects the main circuit panel on the house to determine if it has sufficient capacity for the new square footage. Upgrading the main panel from one hundred to two hundred amps is common during large additions. The technician runs heavy-gauge cabling from the main panel to subpanels or directly to circuits supplying the new rooms. Outlet boxes, light switch enclosures, and ceiling fixture boxes are securely mounted according to electrical code guidelines.
Specialized wiring for internet connectivity, smart home technology, and sound systems is also installed at this point. Proper routing keeps high-voltage power lines separate from low-voltage communication cables to prevent signal interference. Once all wiring is pulled and box connections are prepared, inspectors evaluate the system. The electrical rough-in must pass rigorous safety checks before walls are closed up with insulation and drywall.
Water Lines and Drainage: Integrating Interior Pipes

Parallel to electrical installation, plumbing systems must be routed through floors and wall cavities. Adding bathrooms, wet bars, or laundry spaces requires extensive piping for both supply water and waste drainage. Planning the routing carefully ensures water flows efficiently while maintaining proper drainage slopes across floor joists.
An experienced plumbing service handles the layout of supply lines using durable materials like cross-linked polyethylene or traditional copper. Drain lines require exact grading so wastewater flows by gravity toward the main sewer line without clogging. Plumbers drill precise holes through structural members, installing protective steel plates to prevent drywall screws from puncturing water pipes later.
Vent stacks are routed up through the roof to equalize pressure inside the system and allow sewer gases to vent safely outside. Pressure tests are conducted on supply lines, while water tests verify that drainage lines are completely watertight. Coordinating plumbing work alongside electrical routing prevents trades from blocking each other’s pathway through tight wall spaces. This stage lays the groundwork for smooth fixture installation during final interior finishing.
Heating, Cooling, and Utility Infrastructure Setup
Maintaining comfortable indoor temperatures year-round requires dedicated heating and cooling planning. An addition increases the cubic footage of conditioned air that a climate control system must process. Adding extra rooms without expanding heating capacity leads to hot and cold spots throughout the house.
Contractors providing HVAC services evaluate whether existing equipment can handle the increased volume or if a secondary system is required. Ductwork is routed through open joists and wall cavities to deliver consistent airflow to every room. Return vents are positioned strategically to draw air back to the main unit efficiently. Mini-split heat pumps offer a popular alternative when extending existing ductwork proves physically difficult or cost-prohibitive.
Utility upgrades often extend to domestic hot water generation, especially if the extension includes new bathrooms or soaking tubs. Installing modern water heaters ensures that total household hot water demand is fully satisfied without running cold during peak usage hours. Tankless models are frequently chosen for additions because they save wall space and supply continuous hot water on demand. Once ducting, gas lines, and mechanical units are mounted, HVAC systems undergo initial pressure testing.
Sealing the Envelope: Insulation, Drywall, and Energy Efficiency
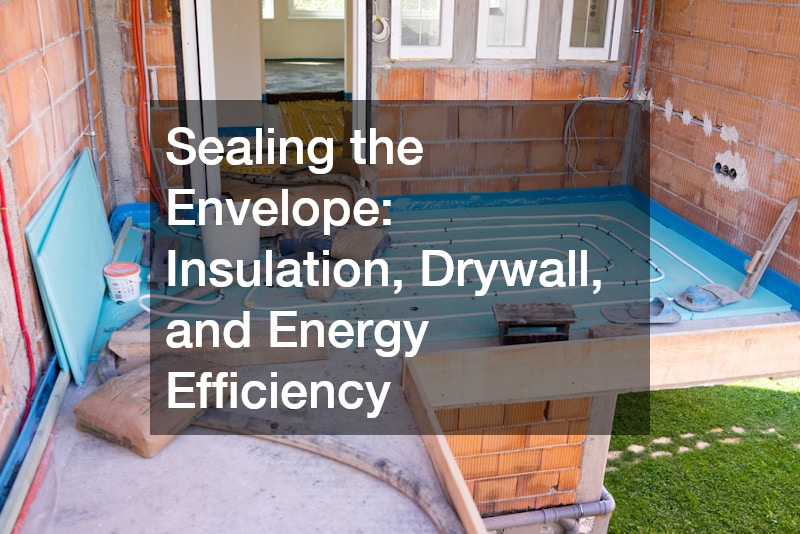
With rough mechanical inspections completed and signed off, insulation installation seals the building interior. Proper insulation regulates indoor temperatures, reduces sound transmission, and keeps energy bills manageable. Fiberglass batts, blown cellulose, or spray foam insulation are applied inside exterior wall cavities, crawl spaces, and ceiling rafters.
Drywall hanging follows immediately after insulation, giving physical form to individual rooms. Workers hang heavy gypsum boards, tape joints, and apply multiple coats of joint compound. Sanding creates smooth surfaces ready for primer and paint. Moisture-resistant drywall is used in bathrooms and laundry areas to resist mold growth.
To further improve thermal comfort and lower energy costs, homeowners frequently choose professional window tinting for newly installed glass surfaces. Solar control window films block ultraviolet rays and mitigate excessive heat gain without blocking natural sunlight. Tinting protects interior furniture from sun fading and reduces strain on air conditioning systems during hot summer months. Once walls are painted and windows are treated, the addition transitions from a dusty construction zone into a living space.
Interior Finishes: Flooring, Cabinetry, and Fixtures
The interior finish stage transforms bare drywall spaces into polished, habitable rooms. Finish carpenters install interior doors, baseboards, crown molding, and window trim to establish the room’s aesthetic style. High-quality trim work covers small gaps along floor edges and adds architectural interest.
Flooring choices set the tone for the entire room. Hardwood, tile, luxury vinyl plank, or carpet are laid down over clean, level subfloors. Hardwood requires acclimation time inside the room before installation to prevent warping due to humidity changes. Tile installation involves laying cement backer board, applying thin-set mortar, setting tiles, and applying grout.
Once floors are installed, plumbers and electricians return for the final trim phase. Plumbers connect sinks, toilets, faucets, and drain lines. Electricians install light fixtures, decorative cover plates, ceiling fans, and smart thermostats. Cabinetry, countertops, and appliances are installed in kitchens or utility areas. Quality craftsmanship during this phase ensures that doors open smoothly, cabinet drawers align perfectly, and every fixture functions properly. Thorough cleaning removes construction dust, making the interior ready for furniture layout and daily living.
Transitioning Outside: Patios, Walkways, and Outdoor Construction
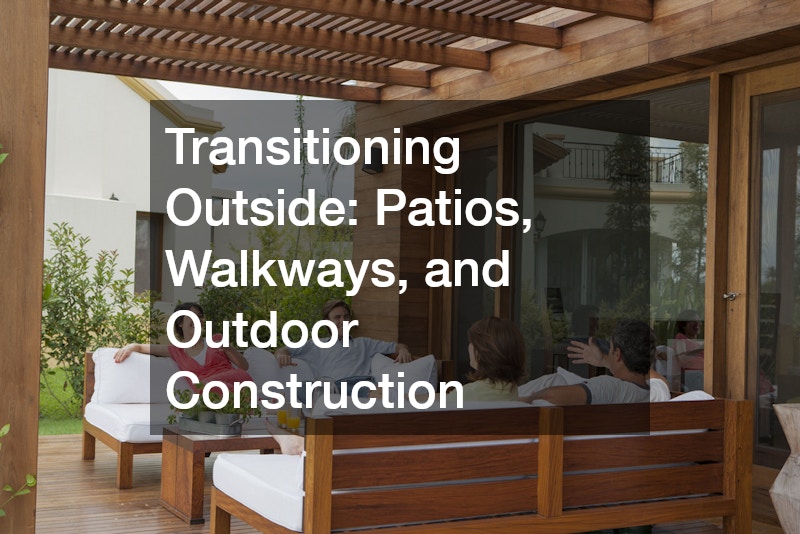
A successful home expansion extends beyond interior living spaces to include exterior transitions. Extending a house changes the shape and traffic flow of the surrounding yard. Creating smooth pathways between the new addition and the back lawn enhances functional usability and outdoor entertainment options.
Hiring a skilled hardscaping company allows homeowners to build custom stone patios, concrete walkways, and retaining walls around the structural footprint. Retaining walls are often necessary to hold back soil that was disturbed during foundation excavation. Paver patios installed directly outside new sliding doors create seamless indoor-outdoor living zones.
Hardscaping crews prepare deep gravel bases and compact soil thoroughly to prevent settling or cracking over time. Proper slope management ensures that rainwater drains away from both the new foundation and paved outdoor surfaces. Adding built-in seating, fire pits, or outdoor kitchens turns an ordinary backyard into a functional extension of the indoor living space. These structural outdoor elements establish a durable framework for surrounding greenery.
Transforming the Grounds: Grading, Turf, and Plantings
Construction equipment and heavy foot traffic naturally compact topsoil and disturb surrounding lawn areas. Once major exterior structures are complete, focus turns to restoring and enhancing the natural environment around the new addition. Softscaping repairs damage and integrates the expansion into the surrounding land.
A qualified landscape contractor evaluates the property to correct grading issues created during construction. Land must slope away from foundation walls at a minimum grade to prevent water from pooling near concrete footings. Crews spread fresh topsoil, install drainage channels, and prepare plant beds with nutrient-rich compost.
Landscaping plans combine native trees, flowering shrubs, perennials, and fresh turf grass. Choosing local plant species ensures long-term survival with minimal watering needs. Strategic tree placement provides summer shade for newly built windows, lowering cooling costs naturally. Decorative mulch beds outline the foundation, adding visual warmth while helping retain soil moisture. Healthy plants and vibrant green grass instantly restore the property’s overall curb appeal after months of heavy construction activity. This green framework softens rigid building lines and connects structural architecture with natural outdoor surroundings.
Illuminating the Exterior and Final Project Completion
The final layer of exterior design involves outdoor illumination and final quality checks. Exterior lighting provides safety along walkways while accentuating architectural features and lush landscaping after dark. Strategic lights make the home safer and visually attractive at night.
Partnering with a professional landscape lighting company brings low-voltage LED systems into the overall design plan. Specialists position path lights along walkways, spot lights on accent trees, and subtle wash lights along new foundation walls. Fixtures are wired into automated timers or smart controllers that adjust lighting schedules based on seasonal sunset times. Proper outdoor lighting brings peace of mind while creating a warm, welcoming ambiance for family members and evening guests.
With lighting installed, the general contractor conducts a comprehensive final walkthrough with the homeowner. Any minor defects, paint touch-ups, or hardware adjustments are documented on a punch list and resolved promptly. Final building inspections are completed to clear municipal permits and obtain a certificate of occupancy. By carefully coordinating skilled trades from initial excavation to outdoor lighting, homeowners achieve a beautiful, functional addition that elevates property value for decades.